Christel Kasselmann's "Aquarium Plants" Available in the USA!!!

We are so honored and pleased to be the sole distributor of Christel Kasselmann’s fantastic book, “Aquarium Plants” in the United States. Even if you have her older English edition, this is almost a completely new book, and worth every penny! It is truly the ultimate reference for aquatic plants. Here are the details from her website:

This is her 4th, revised and greatly expanded edition. 640 pages, 830 color photos, 11 tables, 8 drawings. Publisher Eugen Ulmer, Stuttgart 2019.

Screen Shot 2020-10-20 at 12.36.58 PM.png

What distinguishes the 4th edition?

  • significant expansion to more than 750 aquatic and marsh plants

  • more than 500 detailed plant portraits

  • Information on a further 250 species, varieties, growth forms

  • Inclusion of many new aquarium plants, for example from the genera Bucephalandra, Vallisneria, Cryptocoryne, Eriocaulon, Rotala, Pogostemon, Staurogyne, Moose

  • numerous new images - now with over 830 color images

  • many species are presented in the picture for the first time

  • Incorporation of the latest scientific findings

  • many name changes in families, genera, species

  • Extension of ecological data to 78 biotope descriptions from all continents with full water analyzes, light measurements (PAR) and (partly) soil investigations from around 60 trips to the tropics

  • new chapter "Invasive Plants"

  • Expansion of the “Light” chapter through LED technology and measurements in your own aquariums

  • First description of Limnophila wilsonii

  • Authenticity - experiences with aquarium plants in their own cultures

The color atlas "Aquarium Plants" is unrivaled worldwide in terms of scope and features. 

Aquarium Plants, Cover 3D.jpg

Florida Aquatic Nurseries Q&A

From time to time, we get a question that we think might be of interest to other readers, and we will publish it here. 

Mayuresh Visswanathan wrote:

 I've been watching a lot of videos about the nursery, and I've noticed that you grow some submersed plants in large concrete pools. It appears to be almost no-tech: there's no pumps, filters, or visible CO2 injection. 

How are you able to produce such large volumes of submersed plants without CO2? What are your methods of doing so?

 Here is what Brandon McLane, owner of Florida Aquatic Nurseries had to say:

 We grow all of our submersed aquatics in outdoor concrete tanks.  The plants range from Aponogeton sp. to Cryptocorynesp. to Crinum to Rotala and many more.  All are grown in a similar fashion with a sand substrate that fertilizer is placed into on a periodic basis for nutrients. The lighting is natural sunlight and the water source is our well.  Often times shade cloth is placed over the tanks to keep the lighting down and help the plants grow.  South Florida has hard water as the aquifer is limestone encased.   The water valves to the tanks are left on a slow trickle to replace evaporation and thus creating a flow through system.  Because of this there is no need for pumps or CO2.  Would the addition of CO2 result in more growth?  Yes it would, but at this time we do not need faster growth because we have enough space.  Thus enabling us to keep our costs down to consumers by not having to install a CO2 system.  We do not have a need for filtration system as this is done manually through the cultivation processes.

Karen Randall, Author of Sunken Gardens, further asked Brandon:

I wonder if you have checked your well water for CO2 concentrations? I know that a lot of aquifers that go through similar calcium carbonate ground carry a lot of CO2. You might also be feeding the plants with CO2 with that slow trickle of flow-through water.

 Brandon responded:

You are correct, that the plants are getting some CO2 from the water source.  However, it is not near the amount that adding supplemental CO2 would provide.

 Karen’s final response was:

 The level of CO2 from the well water is lower than in many aquarists tanks, yes, that is true, but the big difference is that, as we see in nature, if you are constantly bringing in new water, it is not a closed system. So the plants never run out of CO2. From what we see from studying plants in natural streams, that is a HUGE factor in healthy plant growth.  

In some places in nature, you find areas totally filled with aquatic plants, like this section of the Thodupuzah River In India.  Because of the constantly flowing water, the plants never run out of CO2, and at the same time, the water is constantly…

In some places in nature, you find areas totally filled with aquatic plants, like this section of the Thodupuzah River In India. Because of the constantly flowing water, the plants never run out of CO2, and at the same time, the water is constantly refreshed and cleaned. This river actually had a higher level of CO2 than many do, which is why we see such really strong growth, even in rather swift-flowing water. (the specific water parameters of this among many other biotopes can be found in Christel Kasselman’s new book, “Aquarium Plants”) We hope to be able to offer this book to you directly later this year. (Covid problems!)

Easy Planted Betta Tank

2017 07 10 Fluval Spec V (15 of 17) 2.jpg

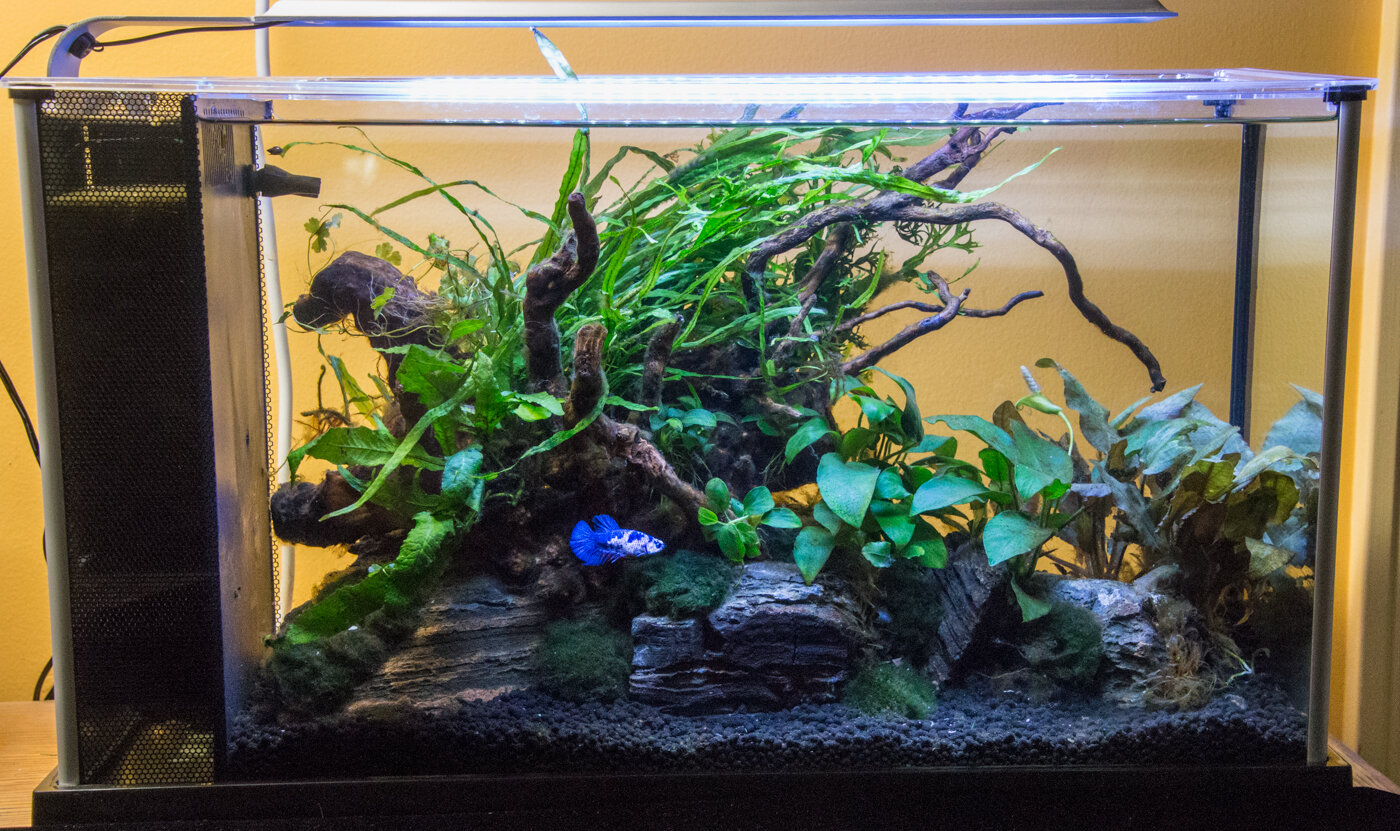
Bettas may survive just fine in those little cups at the pet store for a week or so, as they wait for you to bring them home, but they actually have all the same needs as any other fish for a long, healthy life. The wild ancestors of our domestic Bettas come from densely vegetated, quiet bodies of water. You can create a beautiful, small garden-home for your Betta, and have, not only a gorgeous slice of nature to sit on your desk, but also a home for your Betta that will keep him health, happy, and displaying at his best for you. And it’s not even hard! First tip, however… Don’t buy your Betta yet! Get his new home all set up for him FIRST and give it some time to settle in before bringing your new pet home.

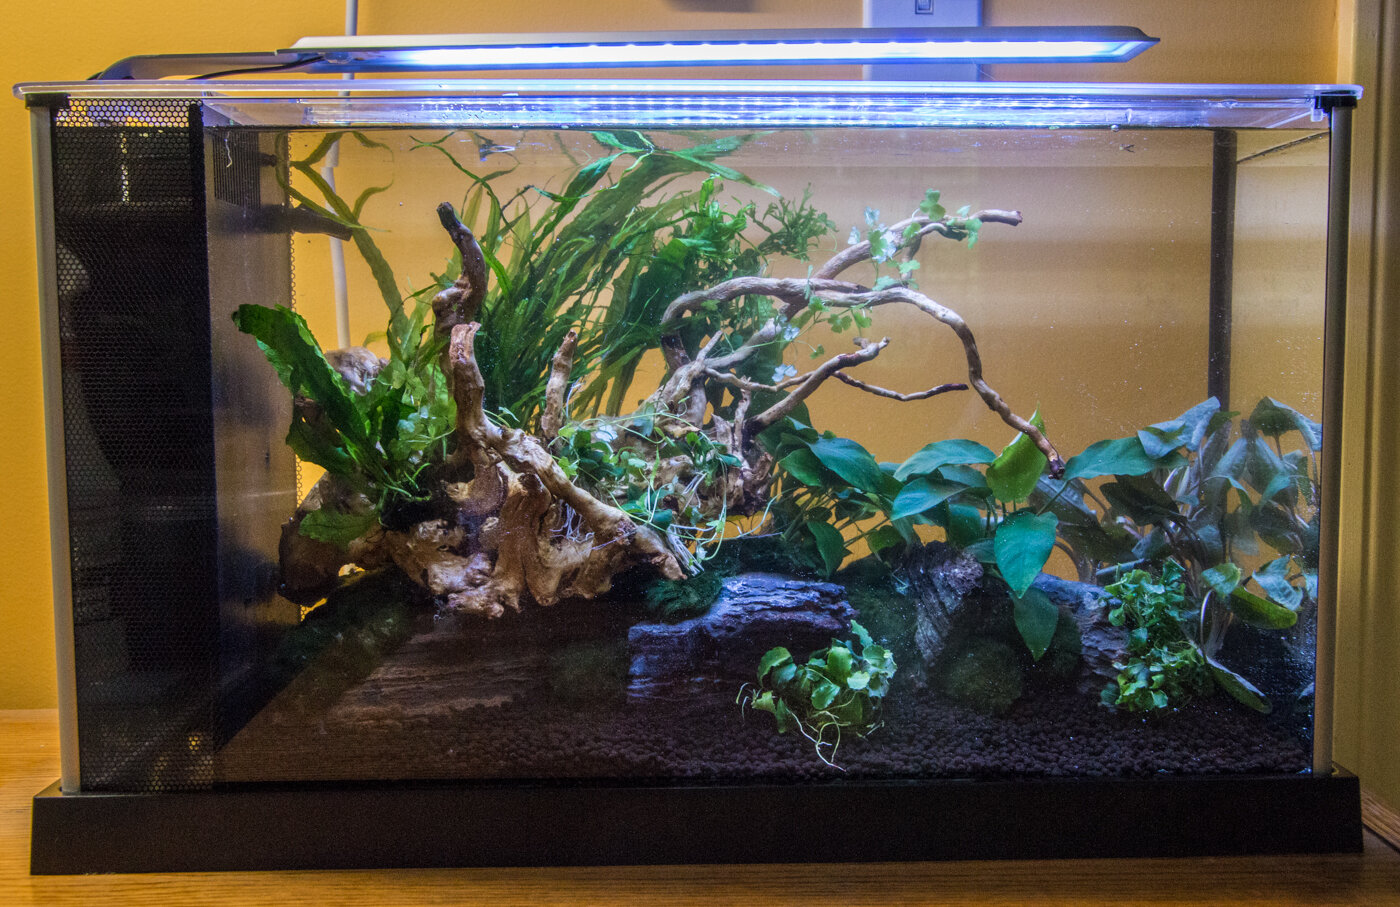
You can find everything you need at your pet store or on line. The easiest way to a healthy Betta home, is to start with an “all in one” aquarium. I chose the Fluval Spec V. This is a 5 gallon tank. While you could get away with a slightly smaller tank, a 5 gallon tank is large enough to be pretty stable, and gives you some room for a pretty “aquascape” (the common term for a pretty garden style aquarium) The nice thing about these all-in-one tank systems is that you get the tank, light, and filtration system all combined. I like this particular tank because all the equipment is hidden in the end panel. There is no unsightly equipment showing inside the tank.

Bettas are warm water fish, even by tropical fish standards, and really need a heater in their tank unless your home is uncommonly warm. There is room in the Fluval Spec to put a small, submersible, adjustable, thermostatically controlled heater in the space behind the dark panel.  If you choose a tank that doesn’t give you this option, you can also hide a submersible heater by placing it horizontally, across the back of the tank. Set the temperature of your heater to between 75° and 80° F.

You will also need some “hardscape” materials (rocks and or wood) to decorate your tank. Most independent aquarium stores carry a good selection of hardscape materials these days.

The big box stores may have some, or you may have to venture further afield. Please patronize your good independent store if you have one. If not, there are lots of online sources of hardscape materials.

Last, you will need substrate for your tank. Plants need nutrition, just like your fish do, and the easiest way to provide this is with a commercial, soil based substrate. I have used Fluval Stratum in this tank, but there are other good options too. Be aware that there are a number of commercial “planted tank substrates” available that do not provide any nutrition for your plants. You can use these, but you will need to feed your plants from the very beginning, while in a nutrient rich soil based substrate, the plants can find their own nourishment for quite a while. You should avoid “fish tank gravel”, because it not only contains no nutrition, but it is also hard for the plants to grab with their roots.

One problem with these little tanks is that the light included is not very bright. For this reason, it is important to choose plants that will grow in fairly dim light conditions. But that’s OK! As long as you choose wisely, these shade tolerant aquatic plants will also grow more slowly, meaning you won’t have to trim your tiny tank too often! I chose the following plants, all available from Florida Aquatic Nurseries. You may be able to buy these right off the rack or out of the tanks at your pet store, but if not, ask them to order them for you. It is much better to have all the plants you need when you set up your tank rather than trying to add them piecemeal later. I have included the scientific names of these plants as well as the common names (where there is one) to avoid confusion. Lots of beginners prefer common names, but in the world of aquatic plants, often there aren’t common names, and sometimes common names are used for more than one, (sometimes quite different) plant. All of that can lead to confusion.

Java Fern (Microsorum pteropus)

Narrow leafed

‘Windelov’

Normal leafed

Cryptocoryne wendtii ‘Bronze’

“Moss Balls” (Aegagropila linnaei)

Bucephalandra “Green Wav

Anubias barteri Var. ‘Nana’

Anubias barteri Var. ‘Nana’ Petite

Hydrocotyle cf. tripartita

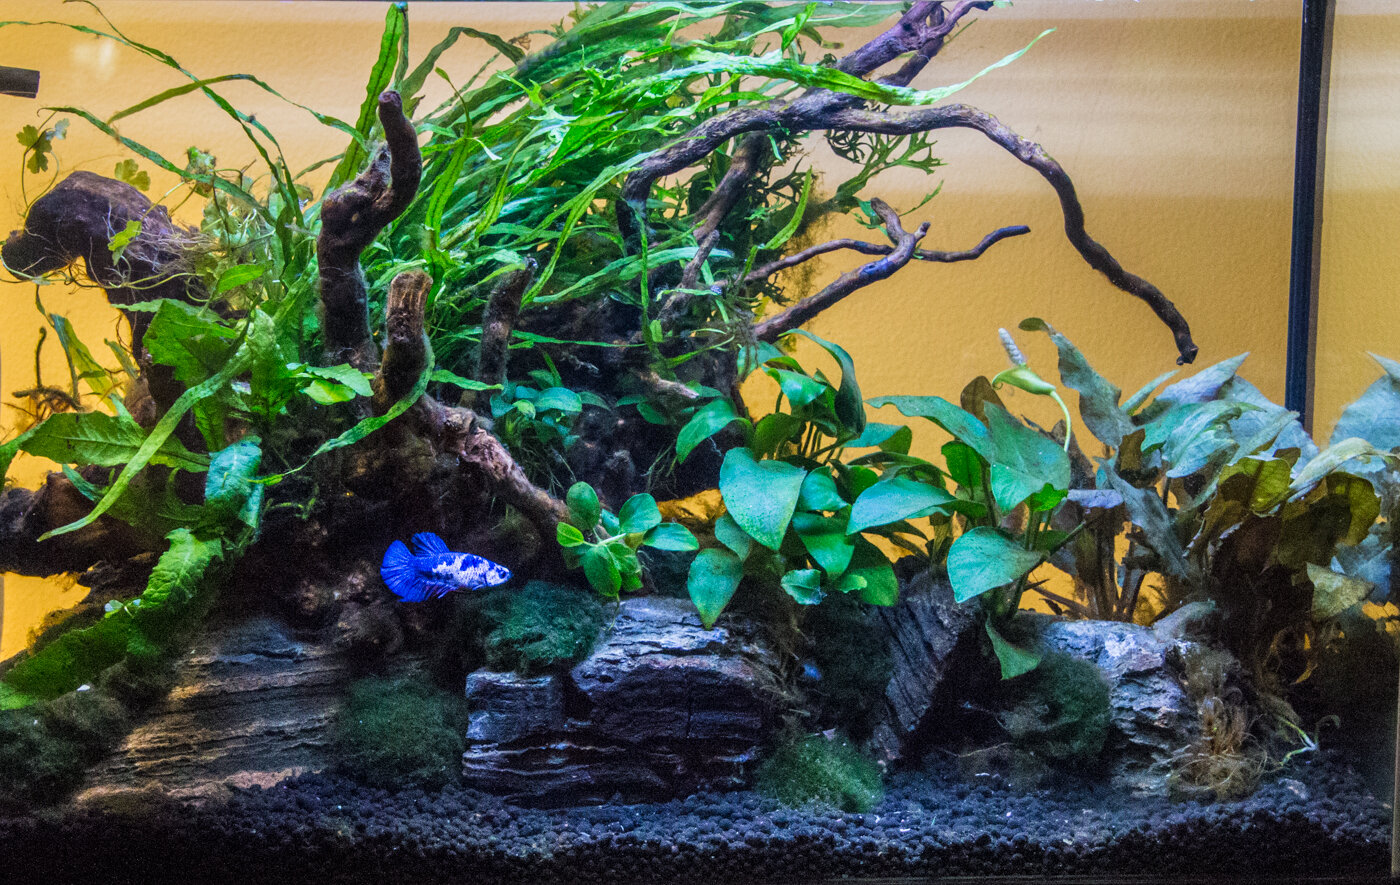
I chose these particular plants because they will all grow nicely in a “low tech” tank (low to moderate light without supplemental CO2) , and although they will eventually need trimming, none will get too large for a small tank.

Once you have all your plants and equipment it is time to get going! With a small tank like this, I find it convenient to set it up on my kitchen counter, where I can get as messy as I want. This size tank is light enough to be picked up and moved easily once it is set up, but before you fill it with water. With a tank much bigger than 5-7 gallons, you will want to set it up in its permanent position, on a sturdy surface designed to hold weight. Remember, water is heavy.  It weighs over 8 lbs. per gallon. That means that a little 5 gallon tank weighs over 40 lbs. once filled. A ten gallon tank weighs over 80! A 5-7 gallon tank is fine on the corner of most desks. A ten gallon tank will be safer on a dedicated aquarium stand unless you are certain the piece of furniture you plan to use is up to the task.

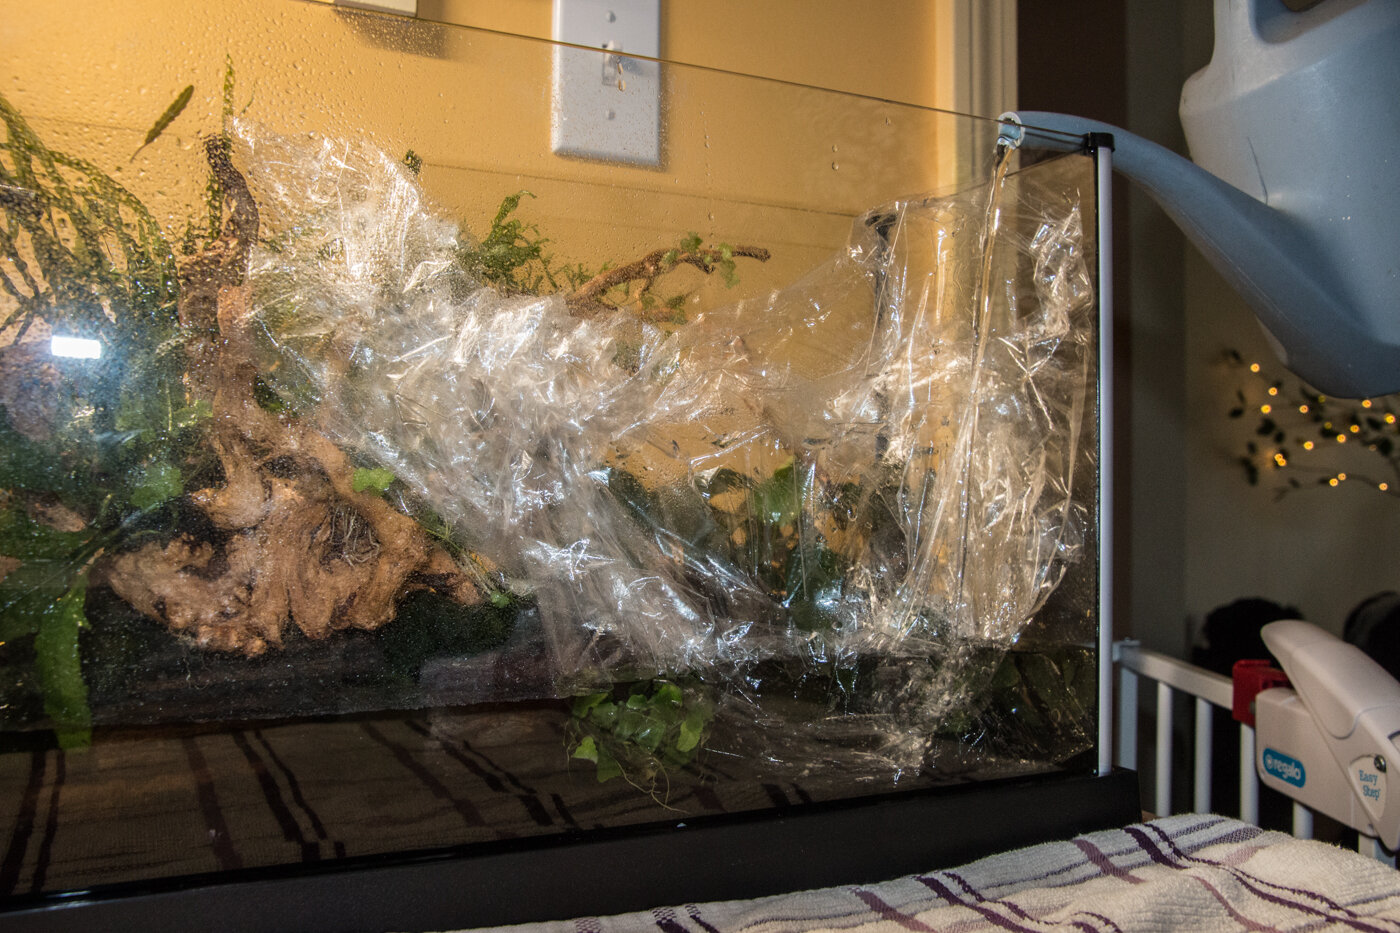
First pour your substrate into the tank. You do not need to rinse commercial aquatic plant substrates as long as you fill the tank carefully. We’ll talk about that later! Your substrate will look best if it is quite shallow and straight along the front edge, but you want more depth in the back so that plants can root. For this tank, I chose Fluval Stratum, which is soil based and perfect for growing aquatic plants that root in the substrate. You could also choose an inert substrate like Eco-Complete or Seachem Flourite. That type of substrate gives plants a good place to anchor their roots, but provides them with no nutrition. So it puts a little more responsibility on you in terms of their care. The cost of both types of substrate is similar, which is why I suggest Stratum, which will nourish your plants.

For this tank, I have chosen “pagoda stone” a rock commonly available at aquarium shops. Whatever stone you decide to use, stick to just one type in any particular tank. It will look much more natural. The wood I chose was a nice, branchy piece of “spider wood”, again a type of wood that is widely available through aquarium stores. Try to avoid having sawed off edges show. However, these tanks are narrow from back to front, and you may find that you need to trim your wood to fit. Just make sure that the cuts are in the back where they don’t show.

Also make sure that there is enough space all around your hardscape to be able to clean. You may not be able to fit your hand, but you need to at least be able to get a scraper through to clean the glass. 

Our Fluval Spec V with the heater installed in the filtration compartment and the substrate, rock and wood arranged. Note that I have left room around the hardscape to be able to clean the glass. The portions that I had to saw off to make the wood f…

Our Fluval Spec V with the heater installed in the filtration compartment and the substrate, rock and wood arranged. Note that I have left room around the hardscape to be able to clean the glass. The portions that I had to saw off to make the wood fit the tank are placed toward the back, where they won’t show.

If you have the time, it is best to soak your wood until it sinks. This has the added benefit that it will leach less tannins into your tank water. Tannins are not at all dangerous, but they do discolor the water, which may people find unattractive.

In this case, I did not want to wait for the wood to soak. But dry wood floats. So instead, I glued it to my rocks with Cyanoacrylate glue, known as “super glue”, and available under numerous brands. I find the gel form easiest to work with. It can be used completely under water if you wish, and is totally fish and plant safe. (it is actually used to seal wounds in hospitals!) I wear nitrile gloves when working with it, because it sticks to skin very, very well! I also grind up some of my soil substrate in a small bowl, and tap this over the glue before it dries. Otherwise you can have blotches of unsightly white glue to look at once it hardens.  Tooth picks can be useful to get the glue into small cracks that are hard to reach. Let the glue set for a few minutes, but it cures quite quickly.

2017+06+07+Fluval+Spec+V+%2816+of+59%29.jpg

Now that the hardscape is ready, it’s time to plant. Make sure the substrate is thoroughly damp, but there should be no pooling water.

I use a hand sprayer for this.

I use a hand sprayer for this.

 Next it is time to prepare your plants. Plants can come packaged a number of different ways. They can be bunch plants, bare root, tissue culture or potted. The plants we have chosen for this tank would mostly be bare root, tissue culture pots (or packages).

Click HERE to learn how to prepare tissue culture plants aquarium use.

Click HERE to learn how to prepare stem plants for aquarium use.

Click HERE to learn how to prepare potted plants for aquarium use. 

As I clean my plants, I like to put them out on a tray, spray them with water, and cover them with plastic wrap. This keeps the plants healthy and wet, and allows me to see what I have to work with.

2017 06 07 Fluval Spec V (20 of 59).jpg

 Now it’s time to plant! The first thing I did was cut the moss into flat slices using scissors. I planned to use these to “green up” the bottom parts of the tank. While many people enjoy “carpet plants” in the front of their aquascapes, there are very few that would grow well in this little tank with modest light, and lots of other plants and materials blocking light to the bottom of the tank. The moss balls are very shade tolerant and grow slowly. It will also make it easier to keep the bottom of the tank clean than true carpet plants would. I used my old friend, Super Glue, to attach the moss ball slices to the stone. I did this even on the edges of the slices sitting on the substrate, as these balls form no roots, and would otherwise just float around the tank.

2017+06+07+Fluval+Spec+V+%2833+of+59%29.jpg

Next I planted my Cryptocoryne wendtii ‘Bronze’ in the back right corner. “Pinsettes”, which are long “tweezers” used for aquascaping, are particularly useful for planting in tight spaces in a little tank. I would highly recommend that you get yourself a pair. But if not, you will need to leave yourself large enough spaces to get the plants down in with your fingers. Cryptocoryne should be planted so that the roots are below the substrate, but the “crown” (the part of the plant from which both the leaves and the roots grow) is not buried. It is better to have the tops of the roots showing a bit than to bury the crown, as that will rot the leaves.  Remember to keep spraying, to keep everything nice and damp as you work!

2017+06+07+Fluval+Spec+V+%283+of+5%29.jpg

 Next attach your Java ferns, Anubias and and Bucephalandra to the hardscape using the SuperGlue. You only need a tiny bit of glue applied to the roots, then press it against the wet rock or wood. The Java ferns will be tallest, and in this case, I was going for a sloping design, so they were attached to the back of the wood on the left. I placed Anubias barteri v. ‘Nana’ on the rocks to the right, and tucked the ‘Nana’ Petite and the Bucephalandra, both of with grow very slowly and also stay very small, into corners in the rock work. Finally, the Hydrocotyle tripartita can be planted in the substrate or left to wind through the other plants and hardscape. I chose the latter option, and simply draped it around the wood and Java ferns.  The final step in the kitchen is to rinse and install the filter media (per manufacturer’s directions).

Now it’s time to move the tank to its final spot and fill it up! I put this tank on my desk, where I can enjoy it while I work! After placing the tank in position, I put a towel on my desk to protect the wood from any drips. Do not plug in your heater or filter yet, and it’s easiest to fill without the light in place on such a small tank. Put plastic wrap over the plants, hardscape and substrate. Even in a little tank like this, I needed two pieces of plastic wrap to protect all parts of the substrate from the water flow. I can’t emphasize enough how important this is, if you don’t want to destroy your beautiful aquascape and get the water all muddy! I use a watering pot for house plants to fill small tanks. This tank only holds five gallons, and many Betta tanks are even smaller. It is only a few trips to the sink to fill the tank, and it is very easy to control the flow doing it this way. 

Here is the top view. We will be pouring only directly onto the plastic wrap.

Here is the top view. We will be pouring only directly onto the plastic wrap.

As you start to pour, let the water go in very slowly.

As you start to pour, let the water go in very slowly.

The water will eventually find its way around and under the plastic, but the flow will be gentle enough that it does not disturb the substrate if you pour slowly.

The water will eventually find its way around and under the plastic, but the flow will be gentle enough that it does not disturb the substrate if you pour slowly.

When you’ve got a couple of inches of water in the tank, stop and pour in the appropriate amount of water conditioner. The water conditioner will neutralize any chlorine or chloramine in your tap water supply. Alternatively, you can add the water co…

When you’ve got a couple of inches of water in the tank, stop and pour in the appropriate amount of water conditioner. The water conditioner will neutralize any chlorine or chloramine in your tap water supply. Alternatively, you can add the water conditioner to the watering pot.

Keep pouring slowly onto the plastic, even as it starts to float up off the bottom. It is still protecting your aquascape and substrate!

Keep pouring slowly onto the plastic, even as it starts to float up off the bottom. It is still protecting your aquascape and substrate!

Remove the plastic, fill the last inch or so, put your cover and light on, plug everything in, and there is your beautiful planted tank, clean, clear and ready for you to enjoy!

Remove the plastic, fill the last inch or so, put your cover and light on, plug everything in, and there is your beautiful planted tank, clean, clear and ready for you to enjoy!

2017 06 07 Fluval Spec V (58 of 59).jpg

Buy an inexpensive timer from the hardware store for your lights, and set it for no more than 8 hours of light per day. More light is likely to cause algae problems for you. If you find that you still get algae, you may need a bit of shade, either by adding some floating plants, or by putting a piece of plastic needle point canvas between the light and the sruface of the water. (remember, we have purposely chosen shade tolerant, slow growth plants for this project!)

Now comes another tough part. Your tank is still not quite ready for your Betta. A fully planted tank like this will be ready to house fish much faster than a tank with just artificial decorations.  But it is still important to let the tap water de-gas for a few days, and let the temperature level out. You may read about “cycling” your tank before introducing fish. This is not necessary in a heavily planted tank meant to house a single Betta. But it is still best to wait at least a couple of weeks before introducing your fish. If you have a friend who can give you a piece of mature filter media, your aquarium will stabilize even faster, but still give your plants time to settle in and root well before introducing your fish!

The nice thing about a low light planted tank set up with simple, slow growth plants is that maintenance is very easy. Of course you need to feed your fish every day, but remember that a Betta is a small fish. He doesn’t need much! More fish are killed by over feeding than under feeding, and uneaten food will lead to algae problems. To keep your plants in top shape, you should feed them too. Your soil-based substrate will help with this, but since many of your plants don’t have their roots in the substrate, they need to be fed through the water column.

My favorite all-in-one fertilizer for small tanks is Thrive, from: http://nilocg.comPlease don’t fall into the trap of buying a “fertilizer” that only contains trace elements. Those are important too, but your plants also need nitrogen, phosphate and potassium, just like garden plants and house plants do, but in a form that is safe for the aquarium. Whatever aquarium fertilizer you choose, make sure it contains these “macro nutrients” (NPK) also. I find The smallest dose of Thrive C, which is meant for “low tech” tanks, works very well in these small tanks. Very often, one dose a week is enough; you can increase from there if needed.

Both your fish and your plants need regular water changes. In a small tank like this, it is easy to use a bucket and a small siphon hose from the pet store. Change about ½ the water weekly, mixing the new tap water to the same temperature as the tank water, and adding your conditioner. I use my trusty flower watering pot to fill the tank back up again. You do NOT need to use plastic wrap for refilling after a water change, the way you did your initial fill. As long as you pour the water in slowly and carefully, you will not disturb your aquascape.

While the water is low during a water change is the most convenient time to clean the glass. I prefer Mr. Clean original Magic Erasers (with no cleaning ingredients, just the plain melamine sponge) for cleaning the inside of aquarium glass. If you get something really tough on the glass, you can use a safety razor blade, but be careful not to cut yourself! Q-tips or an old tooth brush can help in tight corners.

If you are doing regular water changes, not overfeeding, and not leaving the light on too long, you should not have much algae trouble. But it is not uncommon to have at least some, especially over the first few months. Remove it from the glass often, trim any badly affected leaves, and you can use a toothbrush to collect and remove any filamentous algae in the tank.

Clean the outside of the tank with a soft paper towel and glass cleaner that does not contain ammonia. White vinegar can be used in place of a commercial cleaning product if you prefer. Spray the cleaner on the paper towel, not on the tank, to avoid getting any spray in the tank.

Every other week, or once a month, clean your filter by squeezing the sponge in the water removed from the tank during your water change. If your wood has released tannins, (turning the water a clear, brownish color) it will not hurt either your fish or your plants. But if you find the look bothersome, you can replace the activated carbon bag in your filter at that time too. Otherwise, you really don’t need the carbon if you do regular water changes.

Your plants, if you chose the right ones (similar to the list I provided) should be growing well, though not too fast. Still, because they do grow, you will occasionally have to trim some leaves so that the tank doesn’t get over crowded. And even healthynplants occasionally lose a leaf here and there also. There are fancy scissors made specifically for aquascaping, but while you are getting started, any pair of small, sharp scissors will work. Cut the leaves as close to the bottom of the stem as possible.

That’s it! A Betta tank designed with easy, low light plants is not hard to set up, and it is very little work to maintain. A happy, healthy fish in a beautiful planted tank is a work of living art to enjoy on your desk or counter, year-round!

This is the tank after it had grown in for a couple of months, with a happy Betta installed!

This is the tank after it had grown in for a couple of months, with a happy Betta installed!

Nymphaea ‘Southern Charm’ Waterlily Voted Second Place In People's Choice Award Waterlily Competition

Nymphaea Southern Charm

Nymphaea Southern Charm

Each year the International Waterlily and Water Gardeners Association holds a competition for the best new waterlily hybrid. Entrees are sent from around the world to compete in this prestigious competition. The competition takes place in a different location each year.

In 2008 the competition was held at Sara P. Duke gardens in Durham, N. Carolina. All the competitors sent their best new waterlily hybrids to the gardens in May of that year. The plants were potted and grown by Tamara Kilbane and her staff at the gardens. After the plants matured they were judged by visitors to the gardens as well as voting on line by looking at the photos displayed. More than 800 votes were cast with Nymphaea ‘Southern Charm’ taking second place in the waterlily competition.    


Nymphaea ‘Southern Charm’ is a tropical day blooming water lily with a unique smoky blue flower. The pads are attractively mottled with maroon streaks across a dark green background. Nymphaea ‘Southern Charm’ is a fast grower and a prolific bloomer most days having more than one flower open. Nymphaea ‘Southern Charm’ was hybridized by Florida Aquatic Nurseries several years ago but only released to the trade last year. We sent it to the annual competition and we were pleasantly surprised to have such an honor placed on it. This award will add to the list of awards Florida Aquatic Nurseries has accumulated with its new waterlily hybrids over the years.

Nymphaea 'Southern Charm' (1 of 1).jpg